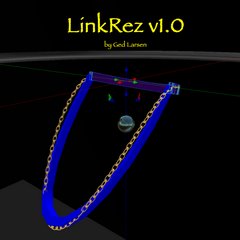
Lesson 1. Make a customized skirt in seconds
1. Drag the LoopRez Object from your inventory onto the ground
- there will be a pose stand and a small metallic ball
- IF the dialog window pops up, give permission to change links (it shouldn't ask again, unless you rez a NEW copy of LoopRez, or if you use the /1 RESET command)

2. Set the number of panels, by chatting the following command:
- /1 number 24
- this sets the number of panels to 24
- the /1 is the channel number that LoopRez Deluxe listens on by default
3. Touch the small metallic ball (or the pose stand)
- LoopRez Deluxe will rez 24 panels, but they'll be scattered about messily, not looking very skirt-like -- they are waiting to be linked together

4. Link together ALL the panels AND the small metallic ball (but NOT the pose stand)
- the easiest way to select them all is to:
- press "CTRL-3" to put you in edit mode
- and then DRAG a box around all the panels and the ball (but NOT the pose stand)
- and then press "CTRL-L" to link all the selected objects
- you should now gasp out "ooh! aah!" as all the panels now zip around and arrange themselves into a perfectly placed flexi prim skirt

5. Now is the fun part! Customize the shape and size of the skirt by chat commands
- the most useful commands to start with are: FLARE ##, WIDTH ##, DEPTH ##
- FLARE
- try typing: /1 flare 80
- the panels will flare outwards to 80 degrees, resembling a ballerina tutu
- try typing: /1 flare 10
- the panels will drop nearly straight downwards, to just 10 degrees outwards
- if you type: /1 flare +10 or /1 flare -5 (notice the "+" or "-") the flare angle will be increased by 10 degrees, or decreased by 5 degrees, from whatever the current setting is
- find a setting that you like
- WIDTH or DEPTH
- try typing: /1 width +0.02
- the waistline width of the skirt will be increased by 2 cm on each side
- try typing: /1 depth -0.01
- the waistline depth of the skirt will be decreased by 1 cm on each side
- standing on the pose stand and/or dragging the skirt in progress around, can help you fine tune
- find a setting that you like

6. Chat the following command: /1 done
- the scripts will now clean up after themselves, so you don't end up with a 24 prim skirt with 24 active scripts lagging you out
(The following section is incomplete, needs pictures, some suggestions for specific prim parameters.)
Lesson 2. Applying colors and textures, and any other prim parameter, to customize your skirt panels using the DropScript
1. As above, create a skirt, but DON'T do the "/1 done" command yet
2. Create a new prim with the color and/or texture that you want to use, and place it near the LoopRez Deluxe object
- it can even be just a standard 0.5 meter prim cube
4. When the dialog window pops up, click the "Color" button or the "Texture" button
- after a pause, whichever option you picked should get transferred to the prim skirt
- customize your colored / textured cube, to become a new skirt panel
- for example, you could try:
- under Object, set size to X = 0.01; Y = 0.3; Z = 0.7
- under Features, turn on Flexible
- under Texture, play with the colors / textures some more
- when you are done, touch the panel (if the DropScript is already running), or else drop the DropScript, and then select the appropriate buttons to transfer whichever attributes you want
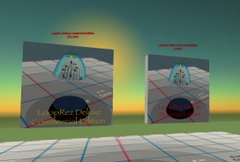
Lesson 3. Applying colors and textures, and any other prim parameter, to customize your skirt panels using "Edit Linked Parts"
Like the"Template Parameter DropScript," Edit Linked Parts also allows you to adjust the skirt after it's been rezzed, but this time by editing the actual skirt that you're working on. The panels can be edited in place, and the changes propagated through the rest of the skirt in progress. Here's how:
As above, create a skirt, but DON'T do the "/1 done" command yet
- First, you rez and link your skirt, just as before. Then bring up the edit window and check off the "Edit Linked Parts" checkbox:

- After clicking the checkbox, click on any panel you'd like to edit to select it, and make all changes as you would normally do. Here, I've applied a texture to the outward-facing surface.
NOTE: Edit Linked Parts and textures don't work with the Personal Edition; all other changes will work: try editing shape or size. This is due to a subtle permissions bug, and can't be fixed. - Finally, "touch" the panel you just edited. Because you have an edit window up, the easiest way to activate a touch is to RIGHT-CLICK the panel you just edited, and choose TOUCH. All parameters will automatically be transmitted, and the changes will spread to the rest of the skirt.
The Personal Edition will not be able to spread textures, because of the permissions system in place. However, all other prim parameters will be transmitted.
- Voila! The entire skirt is updated, and you didn't have to go around dragging any panels to the ground or scripts from inventory.